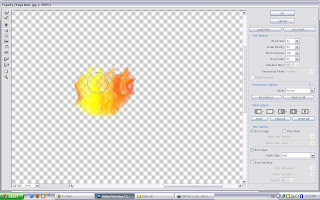
 Step 1 : Using lasso tools to draw a flame shape & fliter it using gaussian blur with 1.2 pixels.
 Step 2 : After fill the flame shape with white color, then using paint brush tools to painting around the outside of the shapes. After select the flame, turn off the visibility of background & leave the flame layer then goto edit & select " define brush preset" and save the "flame shape" as a new brush.
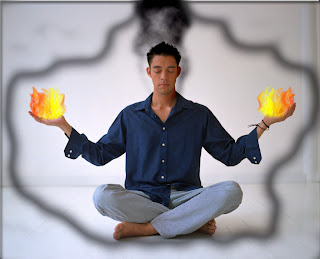
 Step 3 : After that, use again the paint brush tools but is using the new brush that is the flame shape that been saved just now. Paint around on the yoga man's hand using different size of paint brush. After that, select red & yellow & create a rectangle by using rectangle marquee tool
 Step 4 : For the next step, press Ctrl+l to adjust the darkness & brightness of the color of the fire.
Step 5 : To create a mask to the fire flame that I had painted just now on the yoga man's hand, select the final flame layer which color layer was selected and click ctrl+shift+i and press delete. After that, goto fliter and choose liquify to bring some effect to the fire flame. I had choosed turbulence tools end click the mouse and move around to create effect on the flames.

Step 6 : To copy the fire to the right hand, a very simple step that is select the flames & press alt & move. It'll create a copy of the fire flame. Goto transform & flip horizontal so that the flames become opposite of the 1st one and doesn't look weird on the right hand.

Step 7 : Again bring some effect to the flame, I choose pucker tool to create a different effect for the flame.

Step 8 : After that, using lasso tools to draw a smoke shape then fill in white color to the smoke and goto gaussian blur and using 10pixels to make the smoke looks blur.

Step 9 : After adjust the darkness and brightness of the smoke, I had choosed linear burn for the smoke the using eraser tool to clean up those "smoke" that I think should be erase because the smoke was on the yoga man's face.

Step 10 : After edit the smoke, I think that want to create a ice effect so I choose one of the style that I been used in last tutorial and paint around the yoga man. Because I want to make ice, fire together. XD Using the same technique, after paint around, double click on the blending options and turn on " blend interior effects as group " and adjust the capacity until ice effect appears.


This is my final output

No comments:
Post a Comment